Family portrait: progression photos

This year for Christmas I decided to draw for my mum an amateur A1 size family portrait of her, myself and my sister. When I did Art A-level over 10 years ago, I drew portraits of my dad, grandma and late grandfather. My drawings were much more realistic and detailed then, when I was practising drawing on a regular basis, but my mum has always wanted me to draw her and her two daughters together… so with mum experiencing awful health difficulties at the moment, I figured what more a perfect time to (hopefully) make her overjoyed, than at Christmastime? So, here we are fellow bloggers; please see below progression photos (start to finish) of my latest family portrait. Hope you enjoy:

Family portrait:


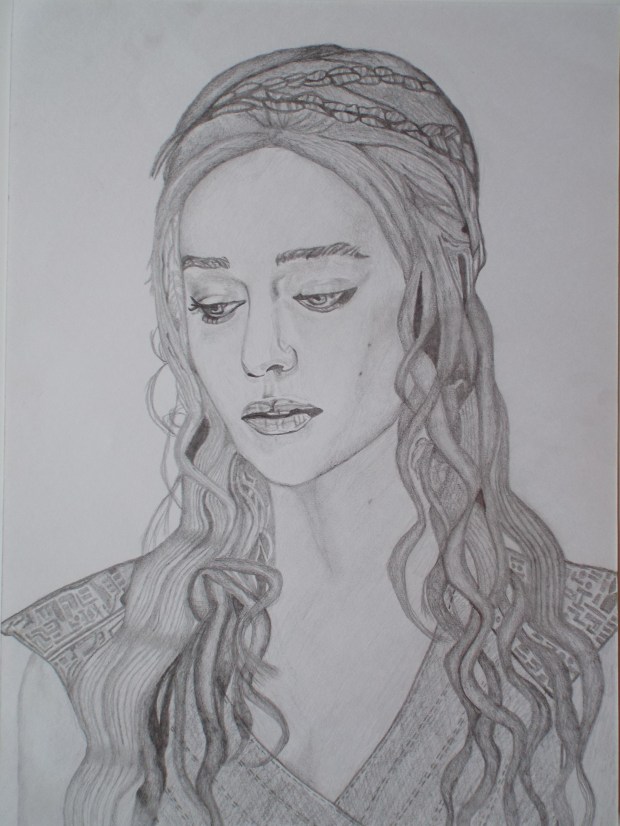
My light box has decided it doesn’t want to work any more (stupid thing), so I stencilled the outline of all three subjects on A1 paper. I began by sketching my sister (left), I also thought it might look pretty to incorporate a lotus flower design border. (The subjects were drawn using artists’ sketching pencils, and the flower border charcoal pencils).


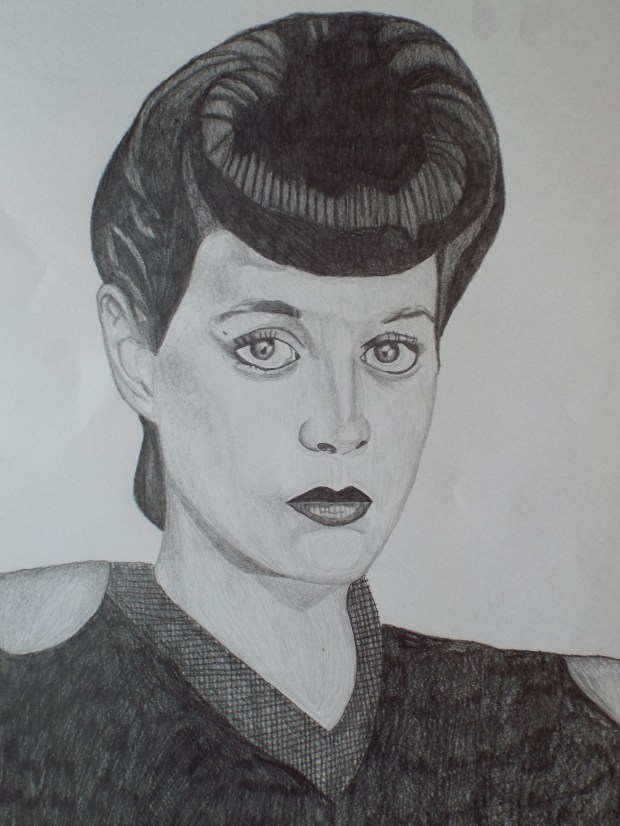
I then made a start on sketching my mum (middle subject). I wasn’t completely happy with the drawing of my mum at this stage. Her complexion was sketched a little too dark, and although quite detailed, mum didn’t appear as youthful as I knew she would like to be portrayed (too many wrinkles showing, haha)!


The last subject I sketched was myself (subject on the right of the drawing). I have drawn a few self-portraits in the past, so it didn’t take me as long to sketch myself. As you may be able to see in the photo above (bottom right photo), at this stage, the three subjects together did not quite ‘click’. My sister and myself stood out more than my mum in the middle, as I had sketched mum with more grey tones, but less definition.


So, the next task was to work on the portrait of mum. It was my intention to rubber out some of the shading, to tone down the shade of her complexion, whilst also using sketching pencils to darken some of her features, to make them ‘pop’ more. I tried to add more definition to her hair, lips, eyes etc.


Lastly, I subtlety sketched the background in light yellow, around each subject in a light blue, and around the lotus flowers in a light purple (these colours match the decor in our living room, where the drawing will be displayed, above our fireplace). I continued to improve all three subjects as I went along, finishing drawing the lotus flowers too; working from the left hand side of the paper to the right, as not to smudge.


And here is the final piece! It was framed by a local framing shop – a gorgeous dark brown frame and cream border – ready just in time for Christmas. Happy days 😛

20171225_114547

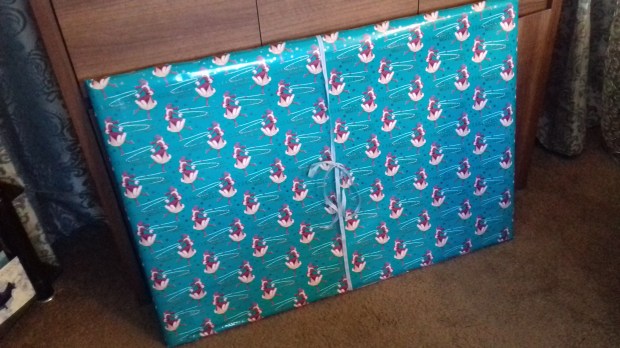
I wrapped it up nicely with some beautiful festive Clinton’s Christmas wrapping paper, and blue ribbon…


And finally, here is my very beautifully festive, and extremely grateful and pleased mum opening her gift on Christmas day! 😀

Overall, the family portrait took me a total of quite a few weeks (many individual hours) to complete. It is rather difficult also to make adjustments to your subjects, on request – contoured cheekbones, larger lips, nice eyebrows, less wrinkles etc (I kept my double chin, haha) – and still keep at least some semblance to the people you are drawing,! This is obviously what I aimed to achieve in my family portrait, a likeness, as well as of course, putting a big smile on the face of a lady very special to me… my best friend, my mum 🙂

A very merry Christmas and a wonderful new year to you all!

Thank you for reading / viewing. Much love, Lauren x


(Please visit my Facebook page ‘UnicornPostbox’ to ‘like’ and ‘follow’)

© 2017 Lauren Parr / http://www.unicornpostbox.wordpress.com


Amsterdam December 2017

Today I returned from a 4 night magical trip to Amsterdam, the Netherlands. We travelled overnight on Monday 18th December aboard P&O ferries (from Hull), enjoyed a two night stay at the 4* luxurious Novotel Hotel, before returning home on the ferry.

When we first arrived into the center of Amsterdam, I must admit I was a bit bewildered by it all. Centraal Station and its surroundings overwhelmed me; it appeared vast and chaotic. I felt like a little bittle fish in a very big pond. However, once I got my head around transportation, which tram to get here, which tram to go where etc, and gathered my bearings, I felt so much more at ease and could begin to enjoy all the beauty Amsterdam has to offer…

Tuesday 19th December  

Me and my mum went to Dam Square first of all. We took some pretty photos of the palace, the beautifully lit Christmas tree, and we were entertained by the amazing street performers. Afterwards, we walked to the infamous Red Light District. We went inside an Erotic Museum, as I thought it would be a good laugh, but mum wasn’t overly impressed, she was acting a bit of a prude bless her so we soon left, haha. In the evening we drifted along the canal on a special Amsterdam Light Festival canal cruise, capturing some lovely photographs of the fluorescent illuminated art. It was truly breathtaking.

Wednesday 20th December   

Wednesday we visited the Stedelijk Museum, and Van Gogh Museum at the Museum Quarter. Our intention was to also go to the Anne Frank Museum, but disappointingly no tickets could be purchased in the city; people book them online weeks in advance, and Thomas Cook travel agents didn’t make us aware of this when we booked the holiday, which was quite unfortunate for us. Nevertheless, we had a wonderful time at the other aforementioned museums. Stedelijk is contemporary and modern art, very much my cup of tea…and Van Gogh, it wasn’t even top of our list but wow, incredible! It was amazing getting up close to many of Van Gogh’s famous works and masterpieces. I feel inspired to practise painting with oils in my art studio!  Painting has never been my strong suit, but admiring Van Gogh’s paintings has really spurred me on to give it a good go. There was also a quaint Christmas market at Museum Quarter, and the pond across from the Rijksmuseum was transformed into a gorgeous ice skating rink for Winter! A wonderful winter-y atmosphere. Later that evening, we ate grub and drank cocktails at the fantastic Hard Rock cafe, playing great rock music and adorning rock memorabilia on all the walls, definitely my sort of place.

Thursday 21st December        

On our last day in Amsterdam before we embarked on our voyage back across the North Sea, we went to the ‘coolest’ bar in Amsterdam, Amsterdam Ice Bar! Here, we were given a token for a cocktail each in the welcome bar, a Heineken in the Ice Bar itself, and a delicious frothy hot chocolate on the way out. We were given a thermal coat and gloves in the Ice Bar, everything is made out of ice; the ceilings, walls, sculptures, even the drink glasses, so yes as expected it was bloody freezing in there, haha. Afterwards, we grabbed a cheeseburger from the many stalls and purchased a few souvenirs in the popular area of Rembrandtplein (Rembrandt Square).  

A couple of insights and musings on my trip…

  1. I have never seen so many bicycles! Reminded me of the Queen song ‘Bicycle Race’.. “I want to ride my bicycle, bicycle” haha. The dutch must be very fit and healthy, and it’s super great for the environment. All countries should adopt this environmentally friendly approach to transport, in my honest opinion.
  2. We smelt the strong aroma of marijuana from the many coffee shops throughout the city, but ours was definitely a cultural trip, as opposed to a drug trip lol
  3. All the dutch people we spoke to were so polite and friendly, especially the staff in our hotel, they couldn’t have made us feel more welcome 🙂

This city break deal was an early Christmas present from myself to my mum, as she really did deserve a nice little getaway for a few days. Life has been pretty stressful for her lately, so I’m just so pleased and over the moon that we have both had such a fabulous time in the Netherlands. I would definitely go again, it was truly spectacular. I will cherish the memories of our holiday together for a very long time.


(Please visit my Facebook page ‘UnicornPostbox’ to ‘like’ and ‘follow’)

© 2017 Lauren Parr / http://www.unicornpostbox.wordpress.com


Upcycled surround sound standing speakers :)

Hi everyone!

Please see below a step-by-step guide of how I upcycled (with the help of my dad lol) four surround sound standing speakers, that my dad no longer wanted… Hope you like 🙂 …


I purchased some plywood from a local business. As seen above, my dad cut the plywood for me, to the same size as some vinyl records I bought from a second-hand furniture shop. I sanded down the sawed circular plywood with sandpaper..


After this, I glued the circular sawed plywood and the actual vinyl records together with contact adhesive…


This is what the stereo speakers looked like before I began upcycling them (see top photo above). The next step was to wash the speakers down really good with some sugar soap, and cover the area where sound is supposed to come out with black tape, in preparation for priming and spraying (as those areas I didn’t want to prime/spray)…


I used a few white finish surface primers purchased from Wilko to prime all four speakers…


Also purchased from Wilko, I sprayed all four of the speakers with a few metallic gold sprays, and a gold glitter spray afterwards for added effect. Both the primers and sprays I used are fast drying, so it’s not too time consuming to wait then spray another couple of layers (as I did, to get the best possible finish)…


I returned then to the vinyls… it was a good idea to sand and file, as well as sugar soap again to ensure the vinyls looked as neat and tidy as possible…


I sprayed the back of the vinyls (i.e. the attached plywood) with a black spray paint, also from Wilko, and touched up areas a little with some black acrylic paint…


I then asked for my dad’s assistance to measure correctly and saw into the speakers, also using a craft knife for precision, to make little slots for the vinyl records to be slotted in…


I gave the speakers another sugar soap to remove any dirt. My dad then used a strong Unibond ‘no more nails’ glue to stick and slot in the vinyl records. Another sugar soap was necessary to get rid of any excess glue and dirt…


I bought some really cool retro music note stickers off of Amazon, I thought these would finish of the speakers perfectly, to create a desired ‘vintage vibe’ and of course definitely in keeping with the whole music theme…


And the final touches – I used a strong Unibond ‘no more nails’ glue to stick some gold sparkly ribbon (from Boyes) around the areas where the vinyl records were already slotted into the stereo speakers… finishing off the project very nicely I think 🙂 …

The end result:


And here are a few photographs showing the end result of my surround sound standing speakers upcycling project; illustrated as natural photographs, and also using a couple of camera effects! … A fully functional unique piece of art, hehe!… They are supposed to act as a quirky shelving units, in case you were wondering, haha 😛

This was only my second upcycling attempt. I think I may donate both these upcycled speakers and my previous upcycling project ,the upcycled drinks trolley, to a second-hand furniture charity shop such as the British Heart Foundation.

If I have learnt anything from my two upcycling projects, it is probably that I shouldn’t go too ‘individual’. By that I mean, I should try and achieve a look which is more likely to be more universally liked.. still vintage / shabby-chic inspired, but more similar to current renovated furniture on the market… I’m going to move away from priming / spraying, and have a go at chalk painting, distressing and decoupage next I think…

So please do keep a lookout for my future upcycling projects!

Nice comments / advice always welcome, hehe!

Thank you 🙂


(Please visit my Facebook page ‘UnicornPostbox’ to ‘like’ and ‘follow’)

© 2017 Lauren Parr / http://www.unicornpostbox.wordpress.com


17 Pencil Portraits – a personal portfolio of drawings

Here is a selection of some of the pencil portraits I have drawn over the last few years. All my pencil portraits are usually A3 size, and I work from photographs. I either use Chuck Close’s method of using a grid system (the long method), or I use a light box / stencil to draw the outline, and then shade from looking at a photograph (cheater, haha!).. I tend to draw famous people, musicians / actors / actresses etc, or film / TV characters, as I am an avid film / TV / music fan… hope you enjoy looking through my lil selection, hehe…

Film / TV characters:

DSCF0153

(My drawing of Daenerys Targaryen, from ‘Game of Thrones’)

DSCF0143

(My drawing of Jack Torrance, from ‘The Shining’)

DSCF0141

(My drawing of Rachael, from ‘Blade Runner’)

DSCF0140

(My drawing of Norman Bates, from ‘Psycho’)

DSCF0135

(My drawing of Freddy Krueger, from ‘A Nightmare on Elm Street’)

DSCF0134

(My drawing of William Wallace, from ‘Braveheart’)

DSCF0129

(My drawing of The Joker, from ‘The Dark Knight’)

DSCF0126

(My drawing of Hannibal Lecter, from ‘The Silence of the Lambs’)

DSCF0120

(My drawing of Yoda, from ‘Star Wars: Prequel Trilogy’)

DSCF0117

(My drawing of Edward Scissorhands, from ‘Edward Scissorhands’)

DSCF0132

(My drawing of Neytiri, from ‘Avatar’)

Famous people:

DSCF0152

(My drawing of Bob Dylan – musician)

DSCF0147

(My drawing of Jimi Hendrix – musician)

DSCF0146

(My drawing of Marilyn Monroe – actress)

DSCF0145

(My drawing of Angelina Jolie – actress)

DSCF0119

(My drawing of Amanda Palmer – musician)

DSCF0007

(My drawing of Bill Hicks – comedian)

I studied Fine Art at A-level (10 years ago, damn I’m getting old lol). My drawings were super hyper-realistic when I was younger, I’ve sort of ‘lost it’ as I’ve got older, because I practise less perhaps, but I still think my attempts are not tooooo bad (hope you agree…haha!) …

I absolutely love drawing, especially portraits. I don’t know why but I just love ‘capturing’ an iconic moment, which is probably why I’m also interested in photography, the idea of ‘capturing’ something pretty, hehe… There’s nothing more therapeutic for me than sat with some pencils and paper, earphones in, cup of tea on the table…that’s my bliss, just lovely.

I intend to draw more personal portraits for people, such as of friends and family (just as a hobby, not professionally). I’m actually working on a big family portrait at the moment, an A1 size of three subjects which is much bigger than I usually attempt, I hope it turns out alright! I might even incorporate some flowers around the edge, and a watercolour effect…

…so watch this space! 🙂


(Please visit my Facebook page ‘UnicornPostbox’ to ‘like’ and ‘follow’)

© 2017 Lauren Parr / http://www.unicornpostbox.wordpress.com


Paphos Photos – July 2017

This July, me and my mum went to visit my uncle and his partner for 12 nights, in their beautiful villa just outside Paphos in Cyprus. The weather was super scorching, and I still came back a darker shade of pale (goddammit, why won’t I tan?!). I thought I’d share a few lil photographs from our trip, showcasing all the wonderful places we were lucky enough to visit…hope you enjoy…

Here we are watching the sunset go down at a lively bar in Coral Bay, overlooking a magnificent shipwreck in the ocean…


We went to go see the popular beautiful intricate Roman mosaics, just by the harbour in Paphos. My favourite is the bottom picture as it depicts Apollo and Daphne from ancient Greek mythology; legend goes Daphne transforms into a laurel tree to escape Apollo’s advances, and I have a tattoo on my right forearm depicting Daphne’s transformation as the name Lauren (my name) derives from laurel (clever, ey, hehe)…


Here’s us just ‘enjoying life’ by the harbour…


One day, we went to visit the ancient theatre and archaeological remains at the acropolis of Kourion (Curium)..on the drive back to Paphos, we stopped by the side of the road to get a couple of great photographs with Aphrodite’s rock in the background…


Another day, we went to a lovely little donkey sanctuary (n’awww) where we fed the donkeys, at a very reasonable price it must be said, and then we had yummy ice cream overlooking a breathtaking view of the coastline…


My absolute favourite place of the holiday however, was the stunning paradise that is Adonis Baths waterfalls in Paphos. I got in and had a little swim, by god the water is freezing! But, wow, absolutely gorgeous place. It literally took my breath away (honestly it did, the water was that cold!)…


And to finish off a few typical holiday pics… being lazy by the pool in the villa, and having a few cheeky glasses of wine / dancing the night away at the local clubhouse… 😀


Thank you very much for reading / viewing… hope you like my holiday photos of Paphos…

Cya later, alligator! 😀


(Please visit my Facebook page ‘UnicornPostbox’ to ‘like’ and ‘follow’)

© 2017 Lauren Parr / http://www.unicornpostbox.wordpress.com


Upcycled Drinks Trolley – start to end process

In February this year I purchased a second-hand drinks trolley from the British Heart Foundation furniture charity shop in Doncaster, for £15. Only recently, I set aside two days of grafting in our garage to upcycle it… I thought I’d share with you my start to end process, I do hope you enjoy…

20170430_152021

This is what the drinks trolley looked like when I bought it. Definitely in need of some tender loving care, and a little titivating! It was quite funny actually because when I brought the trolley outside from the BHF shop in Doncaster, the wheel fell off and started rolling down the street slope! So yeah, it was a bit embarrassing running frantically after a wheel in a busy town centre, but nothing a wingnut couldn’t fix at home!…

The first step was to put on some personal protective equipment, a white overall that made me look like a giant tampon, haha! (Gloves and protective face masks are definitely advisable also when spray painting). I then gave the trolley a good long clean with sugar soap, sanded it down thoroughly, then sugar soaped it again loads to wash off all the debris…

The next stage was to spray the drinks trolley with a spray primer I bought from Wilko’s. I decided to spray paint rather than paint the trolley as I was told this achieves the most effective and fastest drying coverage, which was so true; it only took about 30 minutes to dry, I was pleased overall with the coverage too. I then spray painted only the areas of the trolley I knew were going to be visible in the end product with metallic gold and chrome silver spray paints. Again, these were relatively quick to dry…

I purchased these wooden love hearts from The Works. I used a craft knife to cut the middle of the big love heart, and used the smaller love heart holes as stencils to draw and cut 4 little wooden love hearts, before spraying all these new shapes bright blue…

After that, I cut out some vintage inspired wrapping paper I bought from Clintons to A3 size and laminated them. I glued these to the top and bottom on the trolley using a standard craft glue gun…

Next, I protected the laminated sheets, and spray painted the remainder of the trolley shelves with red, blue, gold and silver splodges. This stage was not planned. Originally, I was going to glue cushion fabric on these areas of the trolley but changed my mind at the last minute. So at this stage, I was pretty much ‘experimenting’ which ooooo sounds so artistic, but in truth it’s probably more accurate to say I was ‘winging it’, haha! I then cut off 8 strips from a red fluffy cushion, to become borders around the A3 laminated sheets…

Next, I used a glue gun to stick down the dried large blue love heart onto the bottom shelf of the trolley (this is where I imagine beer cans to be stored). I also used the glue gun to glue the red fluffy strips of cushion around the edges of the A3 laminated vintage wallpaper…

Lastly, I used the glue gun to glue down 4 pink and cream love hearts I also bought from The Works, then glued to them the 4 small blue spray painted love hearts (where I imagine shot glasses to be kept). I also glued pretty pink ribbon around the edges of the large blue love heart and attached some battery operated lights I purchased from B&M around the top shelf of the trolley…

and yippee, we have an upcycled drinks trolley!

This slideshow requires JavaScript.

This was only my very first upcycling project, I have never attempted to upcycle anything before. So, bearing that in mind, it is certainly not the best but I think I have made a valiant effort, and the end result isn’t toooooo frightful, haha!

I hope you enjoyed the post, please do share with me your thoughts on the project.

Thanks, Lauren x


(Please visit my Facebook page ‘UnicornPostbox’ to ‘like’ and ‘follow’)

© 2017 Lauren Parr / http://www.unicornpostbox.wordpress.com

50 Photos: ‘How to guide’ – Bobble Hats for Beginners

In my recent employment, I helped run arts and crafts sessions for adults with predominately learning difficulties and autism. I worked alongside a wonderful lady who had ample experience in crafts and arty hobbies, and was so kind as to teach me, during our sessions, how to loom knit a basic bobble hat…

Please see below a 50 step photographically demonstrated ‘how to’ guide of how to go about making a basic bobble hat (with brim and pom pom)… I do hope you find the information useful…

  • First of all you will need to purchase a loom knitting kit. Usually, the size loom you will need to use to produce an adult size bobble hat is the largest loom in the kit. You may think “surely that one is too big?”, but trust me, that’s the one you want. In my kit, my largest loom is bright pink (see above)
  • Once you have chosen two colours of yarn (medium or chunky size, depending on how thick you’d like your hat to be), tie a slip knot around the protruding anchor peg (figure 2)
  • Next, wrap the yarn around each individual peg (in a clockwise motion, but the circumference of the loom itself anticlockwise) until you have wrapped every peg (figure 3). Repeat this step exactly so that you end up with two rows of yarn (figure 4). To clarify, by ‘two rows of yarn’ I mean one purple and grey yarn, in my case, underneath another row of purple and grey yarn
  • Then, take your pick and pull the bottom row of yarn over the top row (as demonstrated in figure 5 and 6). Handy tip: if you start with the peg just before the anchor peg, this avoids your yarn unravelling mid-process (which is an absolute nightmare!) Starting with this peg secures your looping
  • Go all around the circumference of the loom anticlockwise pulling the bottom row of yarn over the top row…
  • You should then simply repeat, repeat and repeat the process:
  • Push your yarn down with your pick to make room for a new row of yarn. Loop a new row of yarn, wrapping each individual peg, then use your pick to pull the bottom row of yarn over the new top row of yarn, working your way anticlockwise around the circumference of the loom
  • As you continue with this ongoing process, the depth of your hat will grow at a steady pace (as visible in the figures above)…
  • Once your hat has grown to a reasonable length (twice the size of how big you’d like your brim to be), the next step is to actually create a brim:
  • Firstly ensure there is only one row of yarn on your pegs at this moment
  • Hook with your pick the middlemost loop you have knitted over the top of each individual peg (figures 12, 13 and 14). There should be exactly the same number of loops as pegs, so these should fit perfectly. Handy tip: you can at this stage take your slip knot off the anchor peg and tuck it inside the brim you are creating so it is no longer visible; tuck it in neatly
  • Pull with your pick the bottom row of yarn over the new top row of yarn (as demonstrated in figure 15) all around the circumference of the loom, and hey presto, we have a brim! :D…
  • Then we’re back to growing the depth of bobble hat, which may take a wee while, so patience and perseverance is key
  • Loop a new row of yarn around the circumference of the loom, use your pick to pull the bottom row over the top row, repeat, repeat, repeat (I think you may have the hang of this now, hehe)… continue maybe even for a fair few hours, as your new bobble hat grows and grows in depth
  • Once your hat has grown massively (to round about the size of figure 25), you are ready to finish it off, yippee…
  • Cut your yarn to roughly the length of one and a half circumferences of loom (figures 26 and 27)
  • The next step is a little bit trickier: thread your pick underneath the yarn attached to the peg (figure 28) then hook and pull the cut yarn upwards and out with your pick (figure 29) do this around the entirety of the loom, threading your pick underneath the attached yarn on each peg and pulling the cut yarn upwards and out (a close-up is shown in figure 30)
  • Your bobble hat is now ready to be detached from your loom, just lift it off the peg with your pick (as visible in figure 32)
  • Decide at this point which way round you desire your hat to be, as it is or inside out. Either is perfectly fine, it’s all down to personal preference really
  • For aesthetic purposes, knots should be tied opposite to the way you wish your hat to be worn: If you then pull the loose yarn, your hat will suddenly join together splendidly. Ensure you tie a few knots to secure…
  • Now it’s time to create your pom pom!
  • I have used the largest size pom pom maker in my purchased pom pom maker kit. Generally for an adult size bobble hat, this is the most suitable choice size wise for everything to look in proportion (if you’re making a smaller hat, use a smaller pom pom maker)
  • Place your two (almost) identical pom pom maker shapes on top of each other, they should slot together nicely although you will have to hold them in place, so don’t be surprised if they don’t click and lock together! Tie new yarn around the pom pom maker (figure 37)
  • Wrap your new yarn around one side of the pom pom maker (figures 38 and 39), then basically continue your wrapping on the other side (figure 40)
  • When your pom pom maker is wrapped thickly with yarn on either side, tie a knot to secure (figure 41) and clip your pom pom maker together with the clips that should be provided with your kit (figure 42)…
  • You must then place your thumb or finger (thumb is easiest) through the hole in your pom pom maker (this is very important as your yarn will fall apart otherwise), and use a pair of little scissors to cut all around the middle of the pom pom maker (figures 43 and 44)
  • Cut off a loose bit of yarn (figures 45 and 46), to then tie very very tightly inside the middle of your pom pom maker to secure (figure 47)
  • Your pom pom maker can then be safely be detached, and wahey we have a pom pom!
  • Trim your pom pom a little bit maybe with some scissors for aesthetic purposes, then all is left is to sew your new pom pom onto your hat (figure 50)…

20170424_171357

… And there you have it! You have created your very first pom pom bobble hat! Congratulations! (Mine is modelled above by my lovely mum, hehe)

Remember, you can always choose to use different colours; I have a few bobble hats a grey and a block colour yarn as I think these work quite well, but black goes well too with a block colour, or maybe try different shades of the same block colour – it’s your choice entirely, whatever suits you! 😀

In hindsight, perhaps a video (instead of photographs) would have been a better choice to best illustrate the process of how to make a bobble hat for beginners, but I do very much hope you found the post informative and relatively easy to follow…

Thank you, much love always, Lauren x

(Please visit my Facebook page ‘UnicornPostbox’ to ‘like’ and ‘follow’)

© 2017 Lauren Parr / http://www.unicornpostbox.wordpress.com

Newcastle, Gateshead, Tynemouth: A Collection of Photographs (and musings) 2017

For my 26th birthday this year in March 2017, I was lucky enough to visit the gorgeous city of Newcastle for the weekend…

On my actual birthday, I went to see ‘Mamma Mia: The Musical” with my mum, at the Theatre Royal. It was absolutely amazing. At the end of the performance everybody in the audience got up dancing, and singing to Abba songs. Such a great atmosphere…

Saturday was our main day for sightseeing. The touristy attractions we visited included the Baltic Centre for Contemporary Art and the Life Science Centre museum, both were fantastic. The Baltic exhibited three artists’ works, Mare Nostrum – raising awareness of refugee and migrant journeys across the Mediterranean Sea – Holly Hendry’s ‘Wrot’ exhibition, and my personal favourite, Rodney Graham’s humorous and witty ‘That’s Not Me’ collection of photographic images.  The Life Science Centre showcased a Maker Faire the weekend we visited Newcastle, featuring a whole array of geeky, techy and robotey stuff, as well as talks and performances, really cool stuff. Me and my mum also mooched around the city centre of Newcastle, the main shopping areas, and popular Grey Street. Our hotel was very close to Quayside, so we had the opportunity to take some nice photos of Tyne and Millennium Bridge too…

At night we went out for a few cheeky cocktails, hehe. I have never felt more like a sardine than in Newcastle’s Flares, it was honestly so hectic! It must have taken us at least 5 minutes to squeeze from one side of the room to the other! After a while we decided it would be much more comfy and relaxing to head back to the hotel bar, for a couple of refreshing and fruity bottles of rose 🙂 …

Sunday we caught the bus at Gateshead Interchange to go and see Antony Gormley’s ‘Angel of the North’, it’s HUGE! and HUMONGOUS! 😛 A very impressive piece of art. We then hopped on the metro to the beautiful and quaint little town of Tynemouth. At this point in the day, the clouds had cleared and the sun was shining, so made for some lovely photographs. We dined and drank cider at a posh fancy restaurant before making our way back to Gateshead…

I thoroughly enjoyed my trip to Newcastle, and I would certainly go again in the future. I definitely recommend it to anyone who is considering going. Every single Geordie I spoke to was ‘canny’ friendly, easy to talk to and welcoming.. and if you needed help with anything the response was always ‘nee bother pet’…

‘Propa belta’ of a time! 😀

References

http://www.balticmill.com/ Accessed: 03/04/2017

https://www.life.org.uk/ Accessed: 03/04/2017


Please visit my Facebook page ‘UnicornPostbox’ to ‘like’ and ‘follow’)


© 2017 Lauren Parr / http://www.unicornpostbox.wordpress.com


A Selection of my Photographs: 2016

Here is a small collection of a few of the photographs I took in 2016… I thought I’d just upload a few, as an example of some of my work pre-2017, before I upload any future photography… Hope you enjoy…

1. These photos were taken at Yorkshire Wildlife Park, towards the end of last year. I was actually on a date (the guy with the bug), he turned out to be an absolute tool so is no longer in my life (lol), but I couldn’t resist sharing the photo, the creepy-crawly looks super cool… all the animals there are awesome to be honest, definitely worth a visit if you’ve never been 😀 …


2. These next photographs were taken in and around Sheffield city centre, sometime in  September if I remember correctly… I had an appointment in Sheffield, so took the opportunity to take my camera along and make a proper day of it mooching about here and there; the Winter and Peace Gardens, Millennium Gallery and so on  😀 …


3. These last photographs were taken earlier on in the year, in Hull city centre, on a first date with the aforementioned tool (haha)… as you can see I visited The Deep, as well as having a lazy stroll around the city itself, admiring some of the gorgeous scenery and architecture Hull has to offer…


… and that’s it for the time being folks :D… Please do keep a look out for photographs I post and share here on a later date…

…ciao for now! 😀

(Please visit my Facebook page ‘UnicornPostbox’ to ‘like’ and ‘follow’)


© 2017 Lauren Parr / http://www.unicornpostbox.wordpress.com